For those of you who haven’t used the CRM Developer Toolkit you don’t know what you are missing, it’s awesome and with it Microsoft made developing plugins and workflows a lot easier for CRM 2011 and CRM 2013. The main benefits of the CRM developer toolkit is it makes it easy to create strongly typed classes and to create and deploy plugins. Microsoft has a good page going through the benefits – http://msdn.microsoft.com/en-us/library/hh372957(v=crm.6).aspx but below are the highlights I think are good.
- Easily generate strongly typed proxy classes without having to run CrmSvcUtil.e
- Generate plug-in code so you can immediately begin to write code for business logic.
- Edit and register plug-ins without using the Plug-in registration tool.
- Create new web resources or extract existing web resources, add them to your solution, edit them, and deploy changes all within Visual Studio.
A YouTube video walkthrough
Download SDK
http://www.microsoft.com/en-gb/download/details.aspx?id=40321
You should have visual studio already installed and working
Now install the CRM DEV toolkit, be sure to check for the prerequisites like Windows Identity Foundation
http://msdn.microsoft.com/en-us/library/hh547459(v=crm.6).aspx
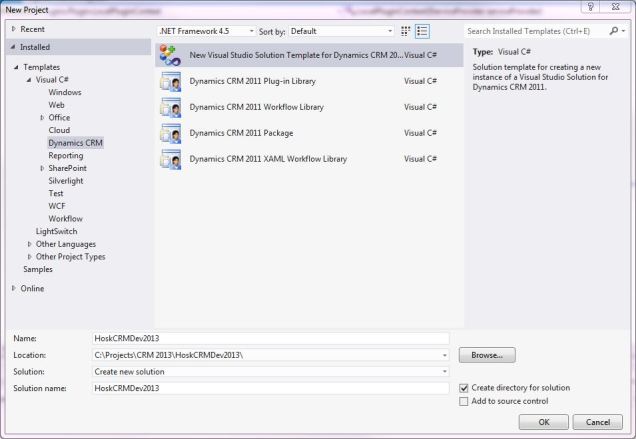
Installed, Create a new project, details in the link below will explains the choices in more detail
http://msdn.microsoft.com/en-us/library/hh547393(v=crm.6).aspx
I will choose New Visual Studio Solution Template because this will allow you to create plugins, workflows and CRM webresouces etc. It will also ask you about Silverlight resources just press cancel if you do not want to create any silverlight projects.
if you have problems and have windows 8 the link below may help
When the project is created it will pop up the Connect to CRM server dialog. This is where you put the connection details to CRM in, in my case I am connecting to a CRM 2013 trial.
To work out the CRM Discovery service name, you can go to Settings –> Customizations –> Developer Resources and it will contain the details of the Discovery service for the CRM instance you want to connect to.
Remove the https:// and the part /XRMServices/2011/Discovery.svc and then what is left should look something like the value below
I have chosen the default solution at the moment but you can change this at any time by going to Tools –> Connect to Dynamics CRM Server and here you can edit the CRM connection details
You are now ready to start creating plugins for CRM 2013, which I will go through at a later date


